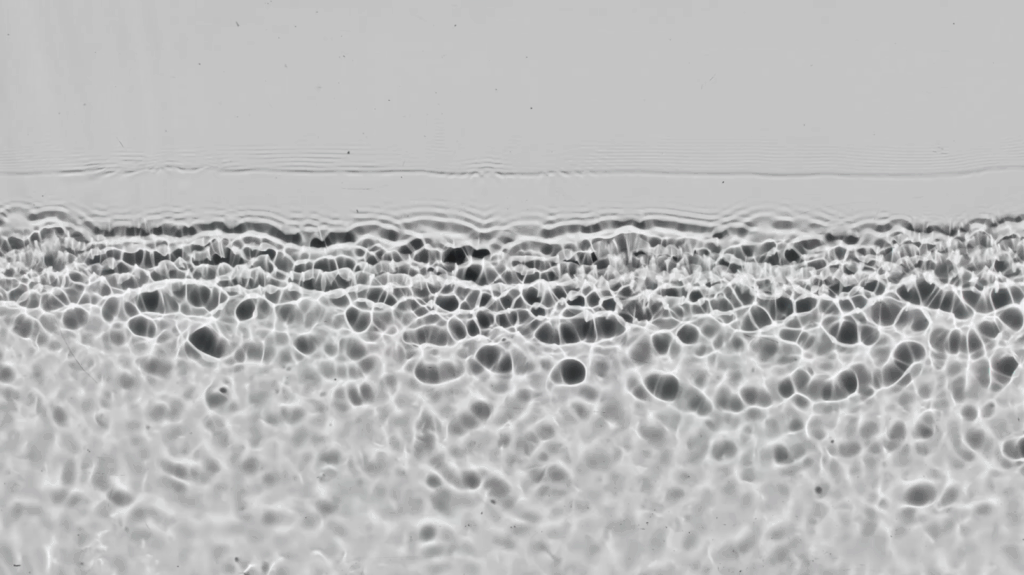
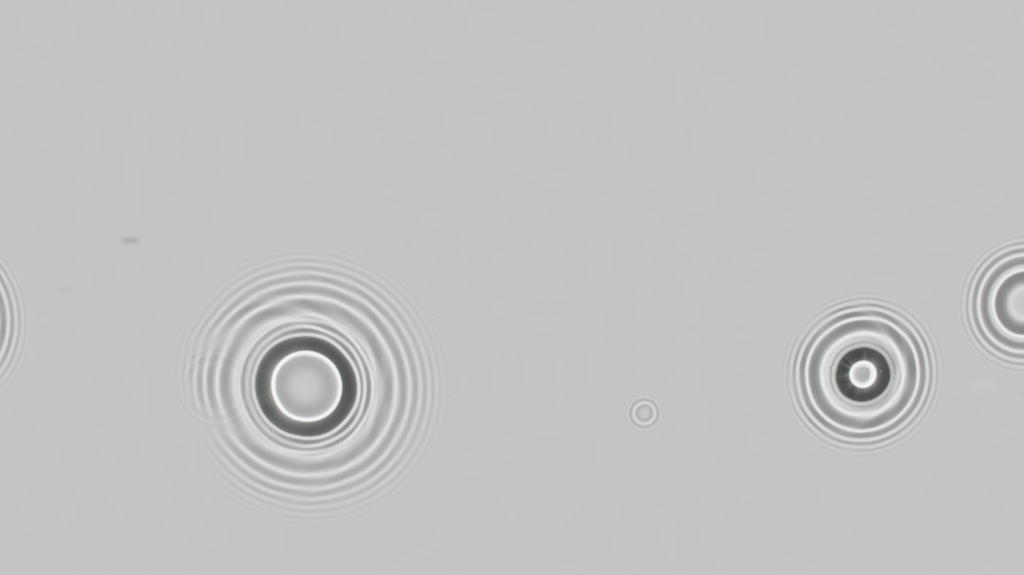
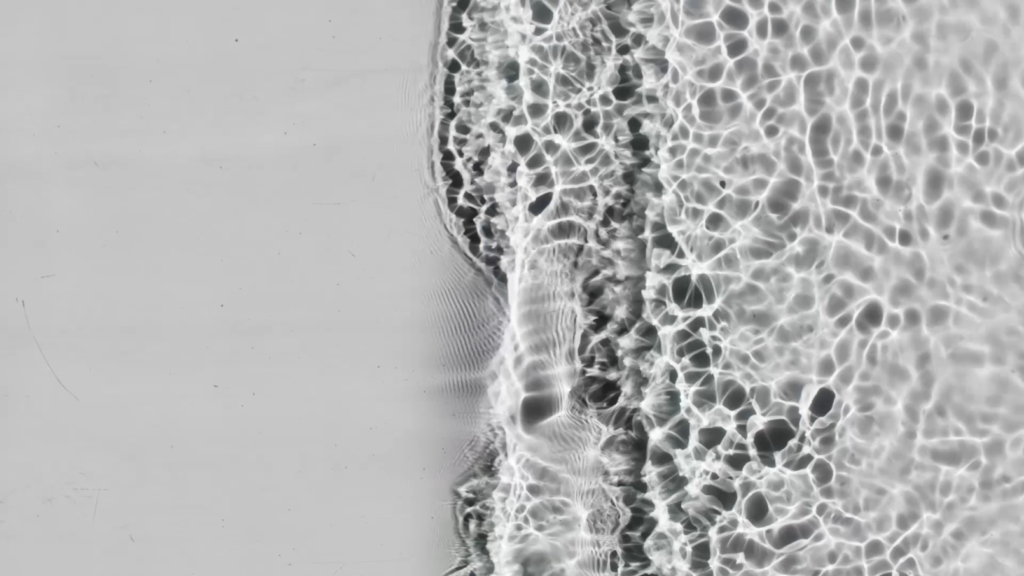
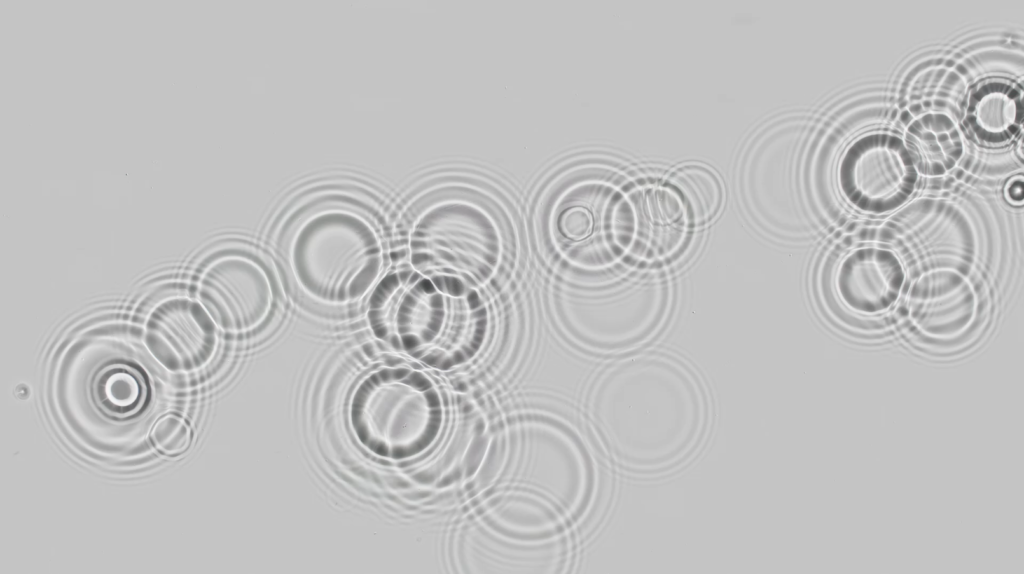
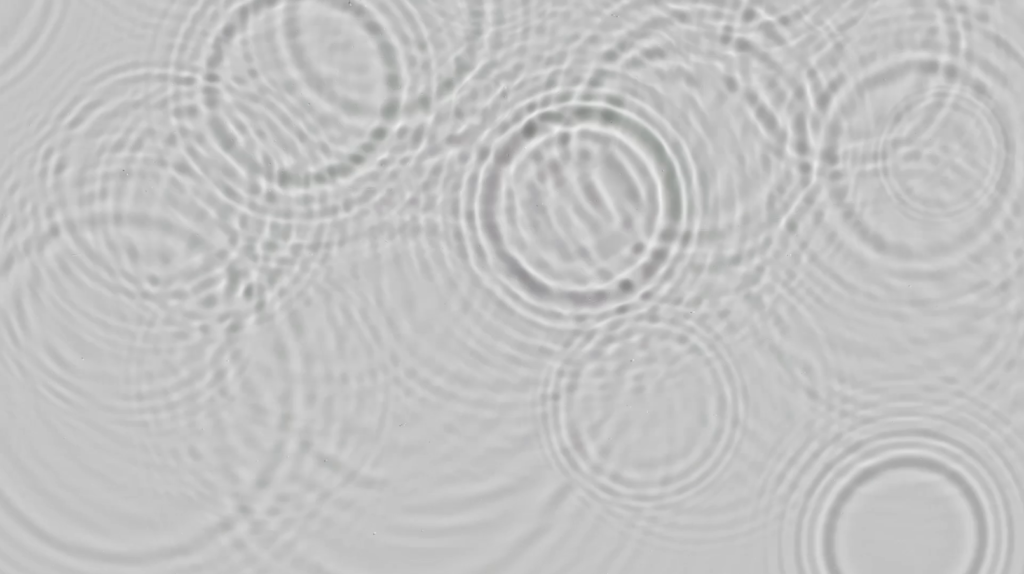
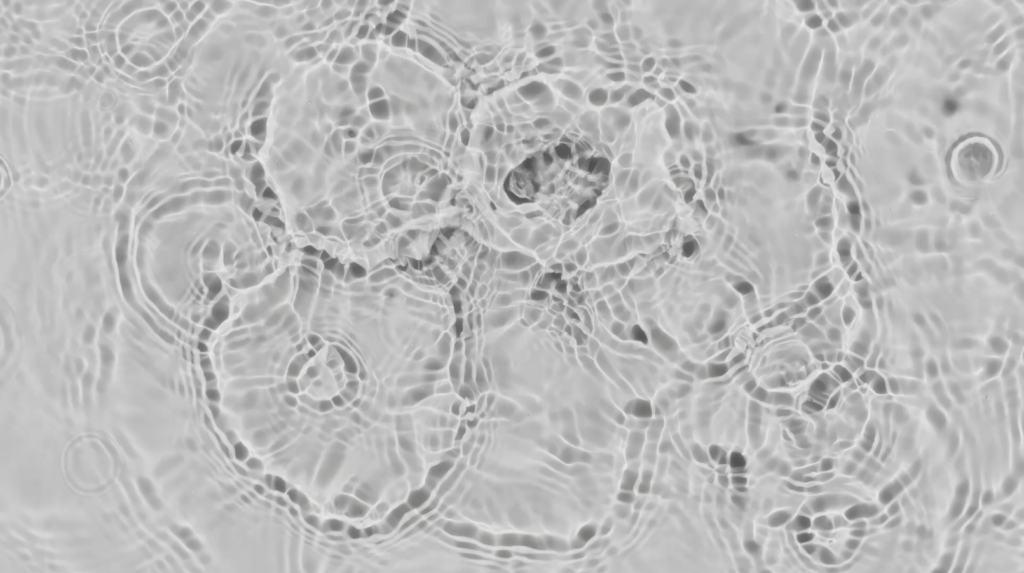
These are some stills of the result:
DOWNLOAD at Gumroad
The Setup:
During my time at film academy, I got to experiment with a little DIY rig for shooting water splashes and drops—perfect source material for making displacement or driver maps later on. Here’s how I set it up:
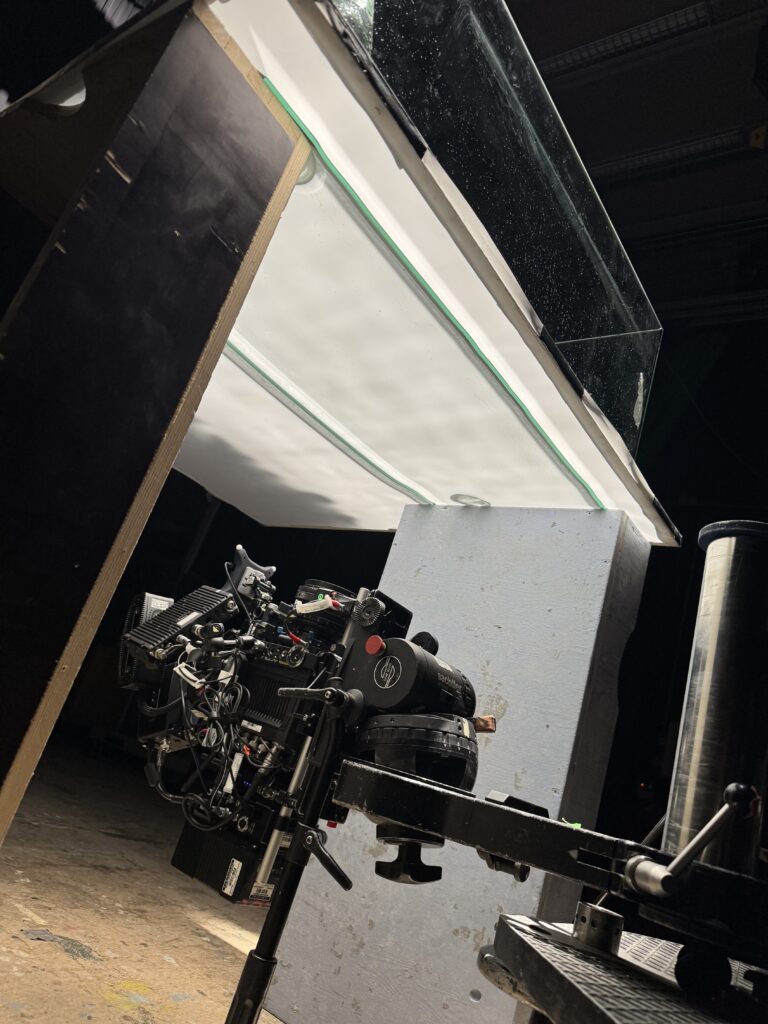
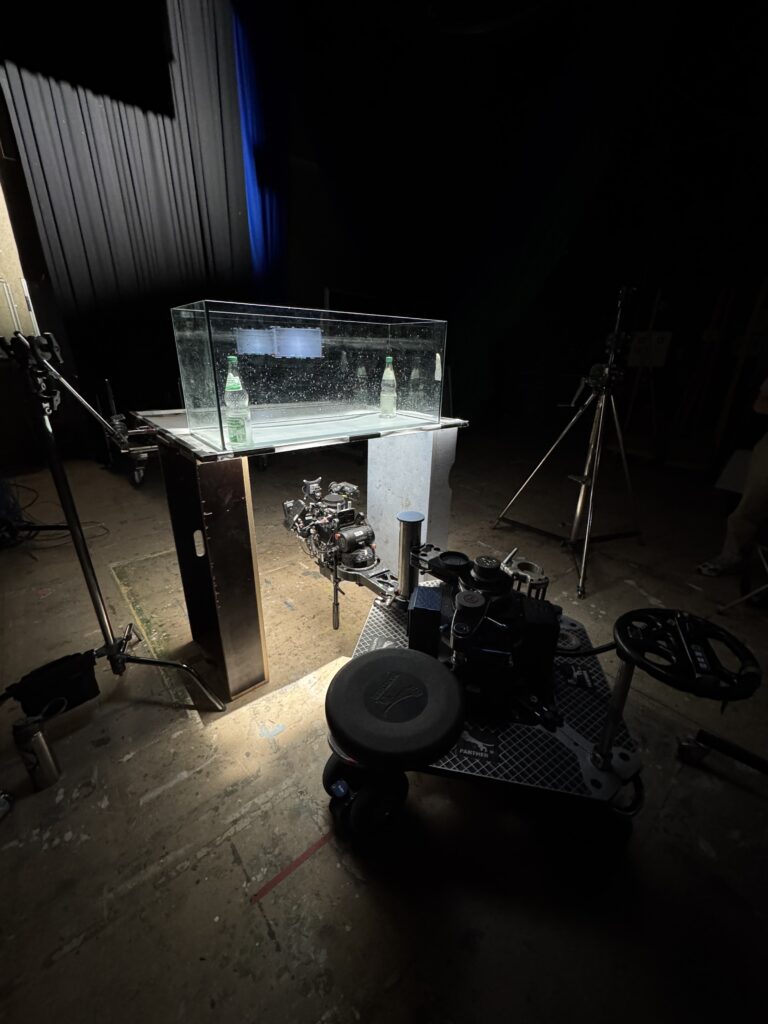
First, I brought in a powerful 2.5 kW tungsten fresnel and pushed it as far back in the room as I could. I needed a bright, even beam, but I didn’t want the lamp itself in the shot. To solve that, I propped up a front‑surface mirror at a precise 45° angle above the tank, so the light would bounce straight down onto the water.
Right beneath the mirror, I clipped on a thin diffusion panel and pressed it as close to the aquarium glass as possible. That little gap made all the difference in capturing smooth refractions and crisp silhouettes of ripples and flying droplets. The aquarium itself was only filled a few inches deep—just enough to give me clean, dramatic waves and surface tension effects without too much slosh.
For the camera setup, I rigged an ARRI ALEXA Mini LF under the tank, paired with a Zeiss CP.3 25 mm lens. Shooting from below let me catch every little splash and caustic pattern in sharp detail, and the wide field of view meant I could frame both broad wave motions and those single droplets in mid‑air.
A few quick tips if you want to try something similar:
Lamp distance: Keep it far enough to stay to have the most parallel light
Mirror alignment: To get the most distance
Diffuser choice: A simple silk panel does the trick; heavier diffusers can kill contrast.
Once you’ve dialed in the light path and camera angle, you’ll end up with high‑contrast footage of water movements. In post, those clips make fantastic grayscale maps that you can use to drive 3D simulations or add realistic splash effects to any shot.